
Bathroom tile grout needs sealing because it is porous by nature, and that porosity makes it a direct path for water, soap residue, oils, and mold spores to work their way beneath your tile surface. Without a sealer, cement-based grout acts like a sponge, absorbing everything it contacts. The Tile Council of North America (TCNA) endorses sealing as a best practice, and the reasons are straightforward:
- Moisture protection: Sealing significantly slows water penetration into grout, reducing the risk of water damage beneath the tile.
- Stain resistance: A sealer blocks soaps, body oils, and dirt from bonding permanently to grout lines.
- Mold and mildew control: By limiting how much moisture grout absorbs, sealing cuts off the conditions mold needs to grow.
- Structural preservation: Water that gets into unsealed grout weakens the bond between grout and tile over time, leading to cracking, loose tiles, and repairs that cost far more than a bottle of sealer.
- Easier cleaning: Sealed grout resists buildup, so routine maintenance takes minutes instead of hours of scrubbing.
Sealing is not a one-time fix. It is a maintenance barrier that wears down and needs periodic renewal, but the protection it provides at every stage is worth the effort.
Why bathroom tile grout needs sealing and how it actually works
Cement-based grout is full of microscopic pores. You cannot see them, but they are there, and in a bathroom, every shower, splash, and steam cycle pushes water directly into those openings. Without a sealer, unsealed grout absorbs water, oils, and dirt, causing discoloration and creating conditions for bacteria and mold to thrive beneath the surface.
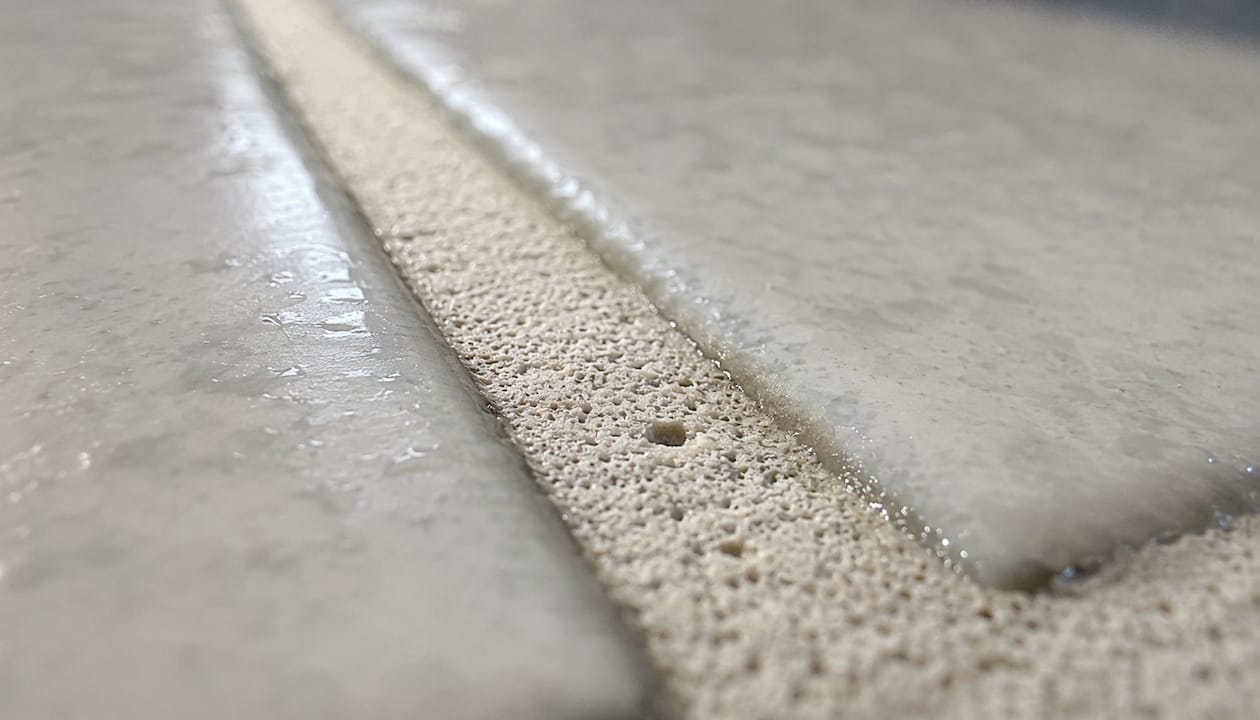
A sealer works by filling or coating those pores so liquids cannot penetrate as quickly. There are two main types worth knowing:
Penetrating sealers (also called impregnating sealers) soak into the grout and create a hydrophobic barrier from within. They do not change the appearance of the grout, and they allow moisture vapor to escape, which is critical in a shower environment. Products like Miracle Sealants 511 Impregnator fall into this category and are widely recommended for bathroom applications because they let the grout breathe while still repelling liquid water. Penetrating sealers are the standard choice for showers, floors, and most tile installations.
Topical sealers form a film on the surface of the grout rather than penetrating it. They can add a sheen and enhance color, but they tend to wear faster in high-moisture areas and require stripping before reapplication. For most bathrooms, a penetrating sealer outperforms a topical one.
Sealing grout is a structural maintenance act. Moisture that works its way beneath the surface weakens the tile-to-grout bond, and once that bond fails, you are looking at loose tiles, cracked grout lines, and potential water damage to the subfloor. A sealer extends the window before that process begins.
One thing to be clear about: sealing does not make grout waterproof or stain-proof. What it does is buy you time. A sealed surface gives you a longer window to wipe up a spill before it penetrates, and it slows moisture infiltration enough to prevent the worst outcomes. Understanding that distinction helps you set realistic expectations and stay on top of resealing before the protection runs out.
Pro Tip: For shower walls and floors, always choose a penetrating sealer over a topical one. Penetrating sealers allow moisture vapor to escape between uses, which prevents trapped moisture from causing the very damage you are trying to avoid.
Common myths about sealing bathroom grout
A lot of homeowners put off sealing because they have heard something that turns out to be wrong. Here are the most common misconceptions, and what the evidence actually shows.
- Myth: Sealing makes grout stain-proof or waterproof. Sealing creates a protective barrier, not an impenetrable shield. Sealing does not make grout stain-proof or waterproof. It extends the time you have to clean up a spill before it soaks in.
- Myth: Once sealed, grout never needs resealing. Sealers are sacrificial barriers that wear down with use, cleaning chemicals, and moisture exposure. Every sealer has a lifespan, and ignoring it means your grout is eventually unprotected without you realizing it.
- Myth: Sealing grout is too complicated for a DIY project. Applying a penetrating sealer to grout lines requires a foam brush or applicator bottle, patience, and about 30–60 minutes for a typical bathroom floor. No special skills are needed.
- Myth: Old or previously sealed grout cannot be resealed. You can reseal grout at any point, provided you clean it thoroughly first and let it dry completely. Sealing over dirty or damp grout is the real problem, not the age of the grout.
- Myth: All grout needs sealing. Epoxy grout is non-porous and does not require sealing. The sealing rule applies specifically to cement-based grout, which is what most residential bathrooms use.
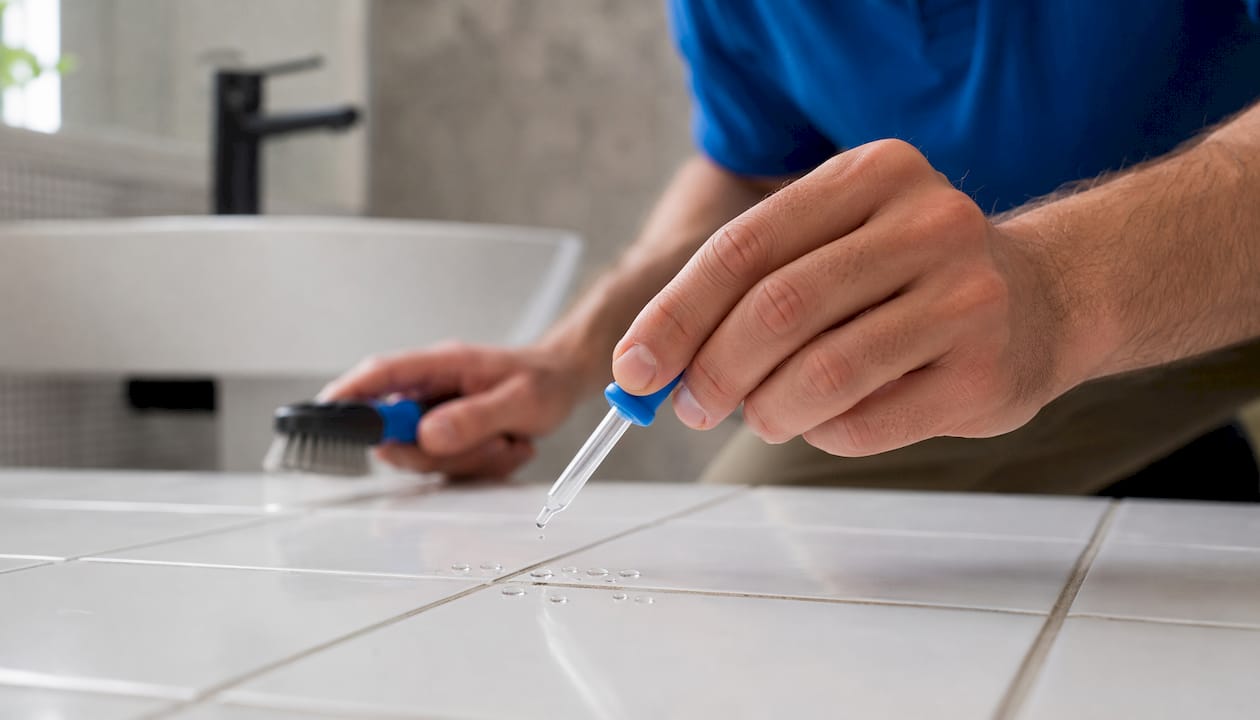
Pro Tip: If you are unsure whether your grout has been sealed before, do the water bead test: drop a few drops of water onto a dry grout line. If the water beads up and sits on the surface, the sealer is still active. If it absorbs within 30 seconds, the grout needs sealing.
The bigger picture here is that sealing is a maintenance habit, not a permanent solution. Many homeowners treat it as a one-time task after installation and then forget about it for years. That gap is exactly when moisture, mold, and staining take hold. Staying on a regular schedule is what actually protects your bathroom long-term.
How often should you seal bathroom tile grout?
Sealing frequency depends on where the grout is and how much moisture and traffic it handles. The intervals below reflect guidance from industry sources and are a reliable starting point for most US homeowners:
- Shower floors and walls: Seal every 6–12 months in showers, where constant water exposure, steam, and cleaning products wear the sealer down fastest.
- Bathroom floors: Seal every 1–2 years for floors that see daily foot traffic and regular mopping.
- Bathroom walls outside the shower: Seal every 1–2 years, since these surfaces face less direct water but still deal with humidity and soap residue.
- Lower-traffic areas: Grout in guest bathrooms or low-use spaces can often go 2–3 years between sealings.
The water bead test is the most reliable way to know when resealing is actually needed, regardless of the calendar. Drop a few drops of water onto a dry grout line. If the water absorbs within 30 seconds, the sealer is depleted and resealing is overdue. Run this test at least once a year in high-use areas.
Signs your grout needs resealing:
- Water soaks in immediately instead of beading on the surface
- Grout darkens noticeably when it gets wet
- Stains from soap, shampoo, or dirt are harder to wipe away than they used to be
- Grout looks dull, faded, or uneven in color
- You cannot remember the last time it was sealed
How to reseal bathroom grout (step by step):
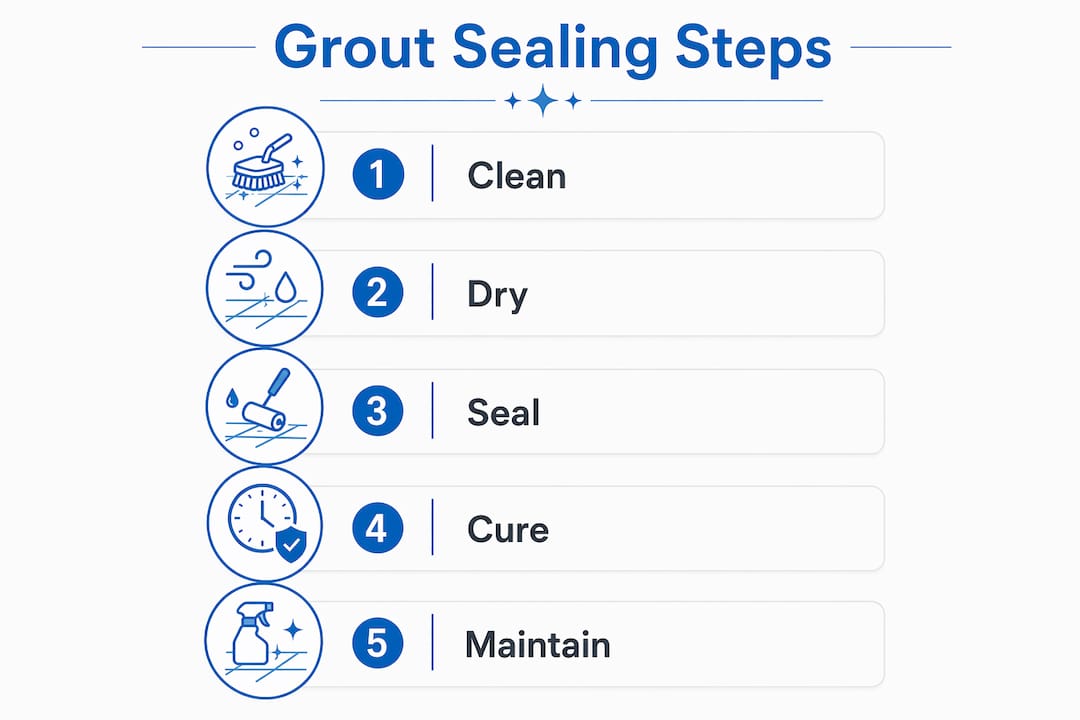
- Clean the grout thoroughly. Scrub all grout lines with a stiff brush and a tile cleaner or a diluted bleach solution. Rinse well. Skipping this step locks stains in permanently once the sealer goes on.
- Let it dry completely. Wait at least 24 hours in a ventilated bathroom before applying sealer. In humid conditions, 48–72 hours is safer. Damp grout will not absorb sealer properly and can cause a milky haze on the surface.
- Run the water bead test. Confirm the grout is dry and ready by verifying water absorbs rather than beads.
- Apply the sealer. Use a narrow foam brush or applicator bottle and work in 3-foot sections. Apply liberally until the grout looks wet with sealer.
- Wait the dwell time. Most penetrating sealers need 5–15 minutes to penetrate. Check the product label.
- Wipe excess sealer off tile surfaces. Use a clean dry cloth before the sealer dries on the tile face. Dried sealer leaves a haze that requires a separate remover to clear.
- Apply a second coat. A second thin coat adds full protection and fills any gaps from the first application.
- Cure completely. Keep the area dry for 24–72 hours, as specified on the product label. Do not run water over sealed grout during this period.
One factor that shortens sealer life faster than most homeowners expect: harsh cleaning products. Sealed grout requires routine maintenance with pH-neutral cleaners. Bleach-based or acidic cleaners strip sealers prematurely, meaning you end up resealing more often than the schedule above suggests.
What happens if grout isn’t sealed in your bathroom
Leaving grout unsealed in a bathroom is not a neutral choice. The consequences build gradually, and by the time they are obvious, the damage is usually well underway.
- Mold and mildew growth: Unsealed grout in a shower absorbs moisture with every use. That trapped moisture creates exactly the warm, damp environment mold needs. Once mold takes hold inside porous grout, surface cleaning alone cannot remove it.
- Permanent staining: Soap scum, body oils, and hard water minerals bond directly to unprotected grout. Over time, the discoloration becomes impossible to scrub out without professional-grade cleaning.
- Structural damage: Water that penetrates grout does not stop at the surface. It works into the grout-to-tile bond, weakening adhesion and eventually causing tiles to crack or come loose. In severe cases, water reaches the substrate beneath the tile, leading to subfloor damage.
- Bacterial growth: Cement-based grout that absorbs moisture and organic matter becomes a breeding ground for bacteria, not just mold. This is a hygiene concern in a space where you bathe.
- Harder maintenance: Every cleaning session takes longer once grout is stained and porous. Sealed grout wipes clean; unsealed grout requires scrubbing that gradually wears the surface further.
Applying sealer to damp or dirty grout creates its own set of problems. Moisture trapped beneath the sealer cannot escape, leading to a milky or hazy finish on the surface and weak sealer penetration. The grout must be bone dry and thoroughly clean before any sealer goes on, or you are sealing the problem in rather than out.
One scenario worth flagging: grout that looks fine but has not been sealed in years. The surface may appear intact, but the interior of the grout lines has been absorbing moisture and contaminants the entire time. Proper grout cleaning before sealing is not optional in this situation. Sealing over contaminated grout locks in whatever is already there and prevents the sealer from bonding correctly.
The cost comparison is stark. A bottle of quality penetrating sealer and an hour of your time costs a fraction of what grout replacement or tile repair runs. Catching the problem early, before the grout bond fails, is the whole point of a regular maintenance schedule.
Why professional grout sealing and cleaning delivers better results
There is a meaningful difference between a homeowner applying sealer to visually clean grout and a professional cleaning and sealing the same surface with certified equipment and products. The gap shows up in how long the results last.
Carpetandtileplus brings over 20 years of tile and grout cleaning experience to every job, with IICRC-certified technicians and organic cleaning products that are safe for your home and family. Before any sealer goes on, the grout is cleaned with professional-grade methods that reach contamination a standard brush and household cleaner cannot. That preparation step is what makes the difference between a sealer that lasts and one that fails within months.
Professional grout sealing includes thorough cleaning with stiff brushes and targeted solutions to remove mold, stains, and buildup before sealing. This preparation step is critical for maximum sealer penetration and longevity. Sealing over grout that has not been fully cleaned traps contaminants permanently and compromises the sealer’s bond.
The grout sealing process at Carpetandtileplus uses professional-grade sealers applied after a thorough cleaning, with a one-hour dry time that minimizes disruption to your day. That fast turnaround is a direct result of the equipment and techniques used, not something you can replicate with off-the-shelf products and a foam brush.
For homeowners in Elgin, Bartlett, Streamwood, Arlington Heights, Palatine, Barrington, and Hanover Park, Carpetandtileplus offers residential tile and grout cleaning that prepares your bathroom surfaces correctly before sealing. Hundreds of five-star reviews from local homeowners reflect what happens when the cleaning and sealing are done right the first time.
Professional service also reduces the frequency of resealing. When grout is cleaned to the core and sealed with a high-quality penetrating product applied correctly, the protection lasts longer than a DIY application over partially cleaned grout. That means fewer maintenance cycles, less scrubbing between sealings, and a bathroom that holds its appearance for years rather than months.

If your bathroom grout is overdue for cleaning and sealing, or if you have never had it professionally treated, contact Carpetandtileplus to schedule a service. The team services the Northwest Suburbs of Chicago and brings the same IICRC-certified, eco-friendly approach to every job.
Key Takeaways
Sealing bathroom tile grout is a recurring maintenance task that protects against moisture, mold, staining, and structural damage, with shower grout requiring attention every 6–12 months.
| Point | Details |
|---|---|
| Grout is porous by default | Cement-based grout absorbs water, oils, and bacteria without a sealer to slow penetration. |
| Sealing is not permanent | Sealers wear down and need renewal; showers require resealing every 6–12 months. |
| Water bead test is your guide | If water absorbs into grout within 30 seconds, the sealer is depleted and resealing is needed. |
| Clean before you seal | Sealing over dirty or damp grout traps stains permanently and causes a milky haze on the surface. |
| Epoxy grout is the exception | Only cement-based grout requires sealing; epoxy grout is non-porous and does not need a sealer. |