Tile grout sealing after professional cleaning is the step most homeowners skip, and it’s exactly why freshly cleaned grout turns grimy again within weeks. Grout is porous by nature. Once a professional crew strips out years of embedded dirt, oils, and bacteria, those open pores are primed to absorb whatever hits them next. Seal them quickly and correctly, and you lock in that clean for months. Skip the seal, and you’re essentially starting a countdown to your next expensive cleaning appointment.
Table of Contents
- Key takeaways
- Tile grout sealing after professional cleaning: what you need first
- How to seal tile grout step by step
- Common sealing mistakes and how to fix them
- Maintaining sealed grout between professional visits
- My take after 20 years of seeing sealed and unsealed grout
- How Carpetandtileplus helps you get tile cleaning done right
- FAQ
Key takeaways
| Point | Details |
|---|---|
| Timing is everything | Wait until grout is fully dry after professional cleaning before applying any sealer. |
| Choose penetrating sealers | Penetrating sealers outperform topical ones by letting grout breathe while blocking stains and moisture. |
| Application technique matters | Use a quality brush and wipe excess immediately to prevent hazy residue on tile surfaces. |
| Avoid acidic cleaners | pH-balanced cleaners protect your seal; vinegar and harsh products dissolve it. |
| Reseal on a schedule | High-traffic and wet areas need resealing every 6 to 12 months to stay protected. |
Tile grout sealing after professional cleaning: what you need first
Before you open a bottle of sealer, you need the right materials and a clear understanding of what you’re working with. Choosing the wrong product or rushing the timeline can actually make things worse.
Penetrating vs. topical sealers
The single most important product decision you’ll make is whether to use a penetrating or topical sealer. Penetrating sealers create an invisible barrier inside the grout pores, allowing grout to breathe while blocking water and stains far more effectively than topical sealers. Topical sealers sit on the surface and can trap moisture underneath, which leads to peeling and, in wet areas, mold growth you can’t see until it’s a real problem.
Professional installers regard penetrating sealers as the industry standard for this exact reason. In showers and bathrooms specifically, penetrating formulas are the only sensible choice. They protect without sealing in moisture that could compromise grout integrity over time.
| Sealer Type | How It Works | Best For | Drawback |
|---|---|---|---|
| Penetrating | Absorbs into grout pores | All areas, especially wet zones | Slightly higher cost |
| Topical | Coats the surface | Decorative or dry areas only | Can trap moisture, peel |
| Water-based | Mild, easy to clean up | Interior residential use | May need more coats |
| Solvent-based | Deep penetration | Heavy-duty commercial use | Strong fumes, ventilation needed |

How long to wait after professional tile cleaning
This is where a lot of homeowners make a costly mistake. Sealing grout too soon traps moisture, which weakens grout integrity and causes premature failure. After professional tile cleaning, you generally need to wait a minimum of 24 hours before sealing. If your home was treated with a steam or hot water extraction process, 48 hours is safer.
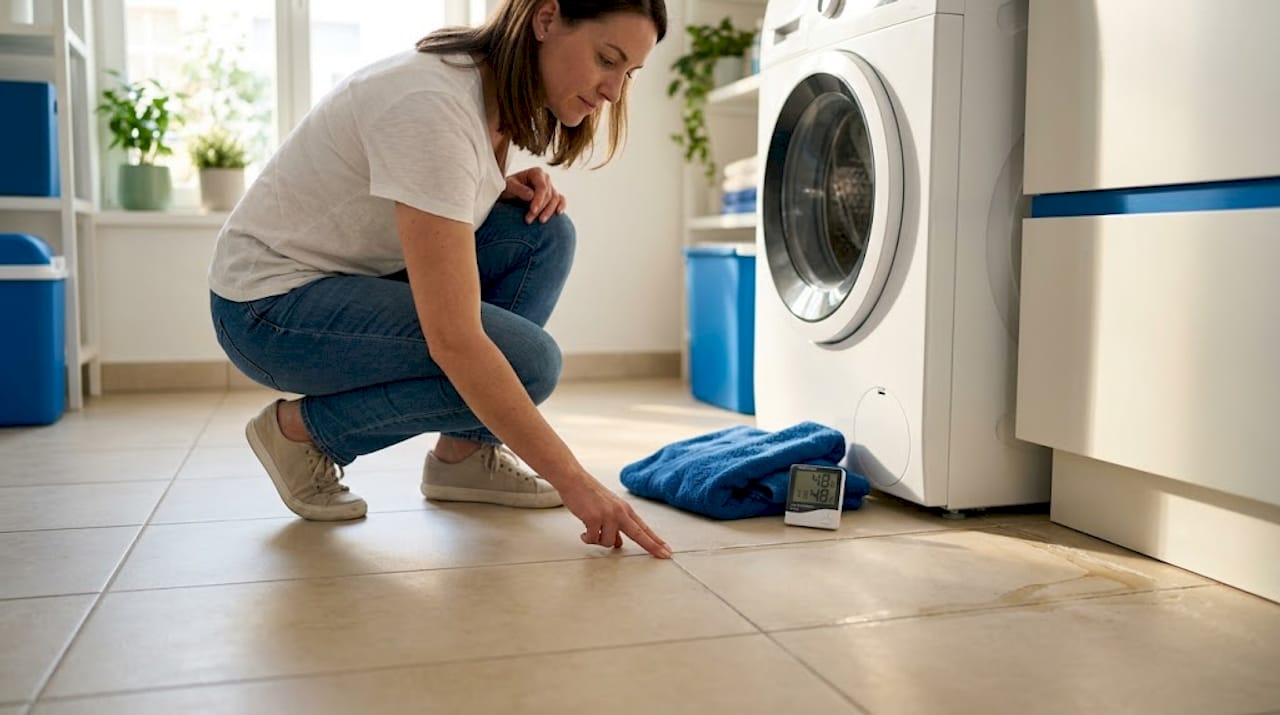
The grout must feel completely dry to the touch. Check it in multiple spots, especially in corners and along baseboards where moisture lingers. If you have any doubt, wait another day.
Pro Tip: Press a dry paper towel firmly against the grout for 10 seconds. If it comes away damp at all, the grout isn’t ready for sealer yet.
Tools you’ll actually need
- A small, angled applicator brush or a grout sealer bottle with a built-in tip
- Clean, dry microfiber cloths for wiping excess
- A foam brush or roller is a common choice people regret. Foam brushes cause uneven distribution and pooling, which leaves a hazy film that’s difficult to remove
- Painter’s tape to protect grout adjacent to sensitive stone tiles
- Proper ventilation: open windows and run a fan, especially with solvent-based products
How to seal tile grout step by step
Once your grout is clean, dry, and you have the right materials, the actual sealing process is straightforward. Rushing any step will cost you results.
-
Confirm grout is fully clean and dry. Run your finger along the grout line. No residue, no dampness. If you spot any discoloration you missed, address it before sealing. Sealing over dirty grout locks the grime in permanently.
-
Test a small area first. Apply sealer to a 12-inch section of grout in an inconspicuous spot. Let it sit for the time recommended on the product label. This confirms the sealer is compatible with your grout type and tile finish.
-
Apply sealer liberally along grout lines. Work in small sections, around 3 to 4 square feet at a time. Apply with a brush and wipe excess from tile surfaces before it dries to avoid hazy residue. Don’t let it pool.
-
Wipe as you go. Use a clean microfiber cloth to remove sealer from tile faces within the time window listed on your product. For most sealers, that’s within 3 to 5 minutes of application.
-
Apply a second coat. Most quality sealers benefit from two coats. Let the first coat penetrate for the time specified, then repeat the process. Two thin coats protect better than one heavy one.
-
Allow full cure time before use. Most sealers are dry to the touch within an hour, but full cure takes 24 to 72 hours. Avoid mopping or heavy foot traffic during that window.
Pro Tip: Top penetrating sealers like Aqua Mix Sealer’s Choice Gold can provide up to 5 years of protection when applied correctly on clean, dry grout. Investing in a quality product upfront saves you from resealing every year.
Sealing considerations by tile and grout type
Not all tile and grout combinations are the same. Natural stone tiles like marble or travertine require a sealer safe for stone surfaces since some formulas can etch polished finishes. Cement-based grout is highly porous and absorbs sealer quickly, often requiring a third coat. Epoxy grout, by contrast, is nearly non-porous and rarely needs sealing. Always read your grout manufacturer’s documentation if you’re unsure which type you have.
Common sealing mistakes and how to fix them
Even with good intentions, the sealing process goes wrong in predictable ways. Here are the pitfalls worth knowing before you start.
- Sealing too early. This is the most damaging mistake. Moisture trapped under the sealer has nowhere to go. The grout weakens, cracks, and can start growing mold from within.
- Sealing over dirty grout. If the grout wasn’t fully cleaned before you sealed, the stains are now permanent. The sealer locked everything in. This is why professional tile cleaning is the necessary foundation before any sealing work.
- Using the wrong sealer type. Topical sealers in shower environments trap moisture against the grout. Over time, this creates ideal conditions for mold, even though the surface might look fine.
- Applying with a foam brush or roller. As noted, these tools create pooling and uneven coverage. The resulting hazy film on your tile is incredibly frustrating to remove after it cures.
- Skipping the wipe step. Letting sealer dry on tile faces causes a milky haze that requires solvents or mechanical abrasion to remove. Wipe excess within the product’s stated window, every time.
- Skipping the second coat. One coat rarely provides full coverage on porous grout. Gaps in coverage mean gaps in protection.
How to test if your seal is working
Once curing is complete, the water drop test is your best friend. If water absorbs quickly into the grout, the sealer isn’t doing its job and resealing is needed. If water beads up and sits on the surface, your seal is intact and doing exactly what it should.
Do this test every 6 months in bathrooms, kitchens, and any high-traffic tiled area. It takes 30 seconds and tells you exactly what you need to know.
Keep in mind that sealing grout reduces mold growth by preventing moisture penetration, but it does not kill existing mold. If mold is present before you seal, address it first. Sealing over mold is like painting over rust.
Maintaining sealed grout between professional visits
Sealing is not a one-and-done solution. How you clean and care for your tile between professional visits determines how long that seal actually lasts.
- Reseal on a schedule. High-traffic and wet areas need resealing every 6 to 12 months. Low-traffic areas like a guest bathroom can go 12 to 24 months between applications.
- Use pH-neutral cleaners only. Acidic cleaners, including vinegar, dissolve grout and the sealant itself. Stick to cleaners labeled pH-balanced or pH-neutral. This is one of those cases where the natural, budget option actively works against you.
- Avoid abrasive scrubbing tools. Steel wool and stiff metal brushes scratch tile and erode sealer. A soft-bristle brush is all you need for routine grout cleaning.
- Mop with minimal water. Excessive water sitting in grout joints accelerates deterioration even through a good seal. Damp mop, not soaking wet.
- Watch for warning signs. Grout that looks darker when wet, absorbs spills quickly, or shows surface cracking is telling you it needs attention. Catching this early is far cheaper than a full regrout.
For effective grout cleaning methods between professional appointments, staying consistent with the right products makes a measurable difference in how long your seal holds.
My take after 20 years of seeing sealed and unsealed grout
I’ve walked into hundreds of homes and commercial properties where the tile looked immaculate after a fresh professional cleaning, but within a few months the grout was dark and stained again. In almost every case, the cause was the same: nobody sealed it after cleaning, or they sealed it too soon with the wrong product.
The biggest myth I keep seeing is that sealing grout is a permanent fix. It’s not. Think of it more like sunscreen. It protects, but it wears off, and you have to reapply it. Homeowners who understand this and build it into their maintenance routine get dramatically better results over time.
Another thing I’ve learned: the product matters less than the preparation. A mid-range penetrating sealer applied over clean, dry grout will outperform a premium sealer applied over damp or dirty grout every single time. I’ve seen people spend money on top-shelf sealers and then wonder why their grout is still failing six months later. Nine times out of ten, it was an application issue, not a product issue.
My honest advice is to schedule your sealing within 48 to 72 hours after professional cleaning, use a quality penetrating formula, and treat it as a twice-yearly ritual in wet areas. It’s not complicated once you stop thinking of it as a one-time project and start treating it like the ongoing maintenance it actually is.
— Jim
How Carpetandtileplus helps you get tile cleaning done right

Carpetandtileplus provides residential tile and grout cleaning for homeowners throughout the Northwest Suburbs of Chicago, including Elgin, Bartlett, Streamwood, and Arlington Heights. If you manage commercial properties, our commercial tile and grout services are built for the demands of high-traffic spaces. Our IICRC-certified team uses organic cleaning products and delivers a one-hour dry time, so your space is ready for sealing faster than you’d expect. With over 20 years of experience and hundreds of five-star reviews, we give your grout the clean foundation it needs before any sealer goes down. Contact us to schedule your next cleaning or ask about our full tile maintenance process.
FAQ
How long after professional tile cleaning can I seal grout?
Wait at least 24 hours after professional tile cleaning before applying sealer. If hot water extraction was used, 48 hours is the safer choice to prevent trapping moisture in the grout.
What is the best grout sealer to use after professional cleaning?
A penetrating, water-based sealer is the best grout sealer for most homeowners after professional tile cleaning. Products like Aqua Mix Sealer’s Choice Gold offer up to five years of protection when applied on fully clean and dry grout.
How do I know if my grout sealer is still working?
Do the water drop test. Place a few drops of water on your grout. If it beads up, your seal is still effective. If it absorbs quickly, it’s time to reseal.
Can I seal grout myself after professional cleaning, or do I need a pro?
Most homeowners can seal grout themselves if the grout is fully clean and dry, the right sealer is chosen, and application technique is followed carefully. The biggest risks are sealing too soon or using a foam brush, both of which compromise results.
How often should I reseal tile grout in a bathroom or kitchen?
Reseal grout in bathrooms and kitchens every 6 to 12 months due to high moisture and traffic exposure. Low-use areas can go 12 to 24 months before needing another application.