Tile grout porosity is defined as the volume and connectivity of microscopic pores in grout lines that absorb moisture, dirt, and contaminants, and it directly determines which cleaning method will actually work. Understanding how tile grout porosity affects cleaning method selection is the difference between grout that looks clean and grout that is clean. Porous grout traps oils, food soils, and microbes deep inside its structure, where surface wiping never reaches. Methods like steam cleaning, penetrating chemical cleaners, and hot water extraction are built for this problem. Tools like Dyson steam cleaners and guidance from CleaningTuts confirm that wipe-and-rinse methods consistently fail on porous grout.
How does grout porosity affect absorption and soil penetration?
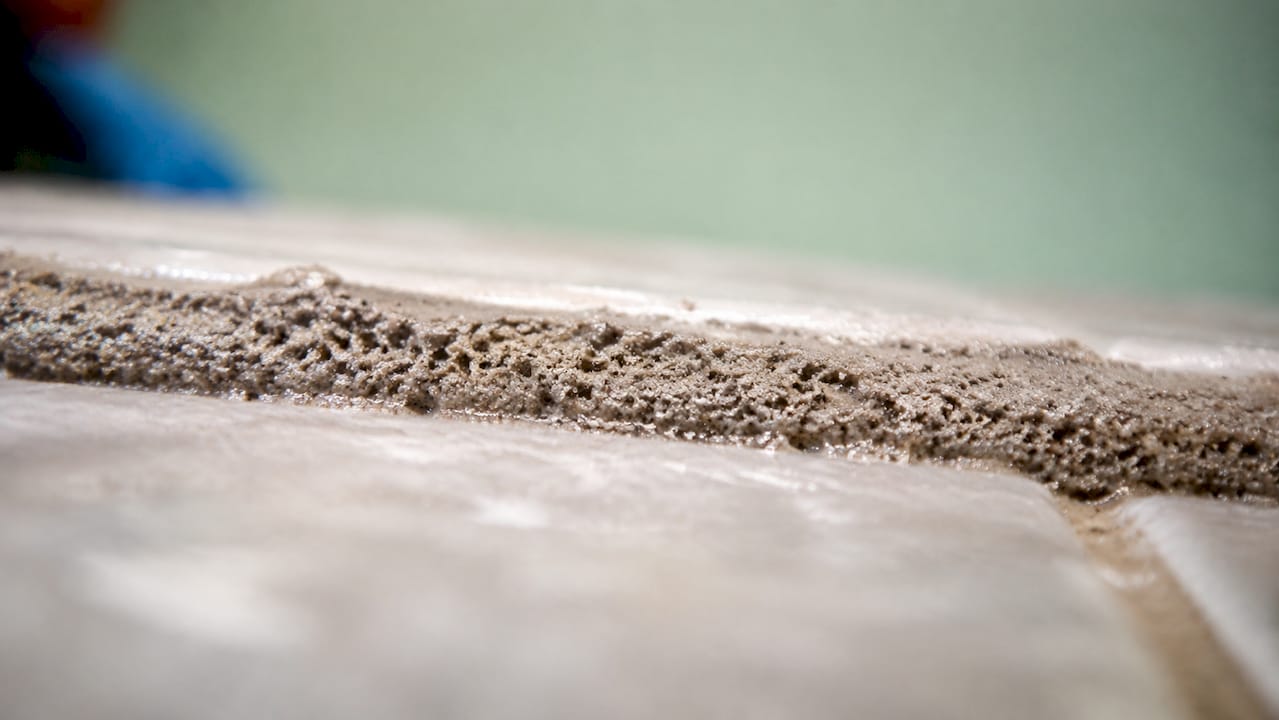
Typical cementitious grout porosity ranges from 5–30% by volume depending on the grout type, mix ratio, and installation conditions. That range matters because it determines how fast and how deep contaminants travel into the grout structure. A grout line at 5% porosity resists most surface soils. One at 25–30% acts more like a sponge, pulling in cooking oils, foot traffic grime, and cleaning residues with every contact.
Higher porosity creates more capillary pathways inside the grout. Those pathways accelerate soil penetration and make it harder to flush contaminants back out. Porous grout can harbor 10–100 times higher concentrations of harmful microbes like Salmonella, E. coli, and Staphylococcus than adjacent tile surfaces. That statistic alone explains why grout hygiene requires a fundamentally different approach than tile cleaning.
Mild cleaning fails on high porosity grout because it only addresses the top layer. The embedded grime below the surface stays put and continues to feed microbial growth. Over-aggressive heat or harsh chemicals create a different problem: they can increase porosity by breaking down the grout matrix, which accelerates re-soiling after cleaning. The goal is penetration without destruction.
| Grout Porosity Level | Absorption Behavior | Cleaning Difficulty |
|---|---|---|
| Low (5–10%) | Slow absorption, surface soils dominate | Moderate; surface methods often sufficient |
| Medium (10–20%) | Moderate absorption, embedded soils common | High; requires dwell time and agitation |
| High (20–30%) | Rapid absorption, deep microbial load | Very high; penetration methods required |
Pro Tip: Run your finger along a dry grout line after mopping. If it picks up a gray or brown residue, your grout porosity is high enough that dirty mop water is actively pushing soil deeper into the grout rather than removing it.
Sealed vs. unsealed grout: how does it change your cleaning approach?
Sealed grout repels water, causing it to bead on the surface. Unsealed grout absorbs water, causing it to darken within seconds. That single difference changes everything about how you clean. Before you choose a cleaning product or method, you need to know which type you are dealing with.
The water-drop test is the fastest diagnostic tool available. Place a few drops of water on the grout line and watch for 30 seconds. Beading means the sealer is intact. Rapid darkening means the grout is unsealed or the sealer has worn through. This test costs nothing and takes under a minute. The sealed or unsealed status should be checked before every deep cleaning session, not just once at installation.
Sealed grout allows you to use surface cleaners with mild agitation and shorter dwell times. The sealer acts as a barrier, keeping most soils on top where they are easy to remove. Unsealed grout requires penetration-focused methods with controlled dwell times and thorough rinsing. The cleaning solution needs time to work its way into the pore structure and loosen embedded soil before you agitate and extract.

The risk with unsealed grout is over-wetting. Flooding unsealed grout with aggressive chemicals or leaving a cleaner to sit too long can reactivate mineral compounds in the grout and cause efflorescence, the white powdery residue that signals moisture damage. Prolonged dwell on unsealed grout can also degrade any remaining sealer bond, leaving the surface more vulnerable after cleaning than before.
| Grout Type | Water Behavior | Recommended Cleaning Method |
|---|---|---|
| Sealed | Beads on surface | Surface cleaners, mild agitation, short dwell |
| Unsealed | Darkens rapidly | Penetrating cleaners, controlled dwell, thorough rinse |
| Worn sealer | Partial beading | Treat as unsealed; reseal after cleaning |
Pro Tip: If grout darkens quickly during cleaning, treat it as high-absorption grout immediately. Reduce your cleaner concentration, shorten dwell time, and increase rinse frequency to avoid pushing dissolved soils deeper into the pore structure.
Which cleaning techniques best match grout porosity levels?
Matching your cleaning technique to grout porosity is the core skill in effective grout maintenance. The right method depends on three factors: porosity level, sealing status, and the type of soil you are removing. Here is how the main techniques stack up.
Steam Cleaning
Steam cleaning penetrates porous grout by delivering heat above 200°F directly into the pore structure, loosening embedded soils and killing microbes without chemical residue. Dyson and other equipment manufacturers recommend keeping the steamer moving at all times and using moderate temperatures to prevent grout damage. Steam cleaning works best on medium to high porosity grout. Used too aggressively or too frequently, it can expand the pore structure and increase re-soiling risk. Once a month is the recommended maximum frequency for steam cleaning grout.
Chemical Cleaners
Chemical cleaners must match the pH tolerance of your grout type. Cementitious grout is sensitive to highly acidic cleaners, which can etch the surface and increase porosity over time. Alkaline cleaners work well for grease and food soils. The key variable is dwell time control. Dwell beyond 15 minutes risks efflorescence on unsealed grout and degrades sealer bonds on sealed grout. Set a timer. Do not let the cleaner dry on the surface.
Mechanical Agitation
Stiff-bristle brushes and rotary scrubbers break up soil that has bonded to pore walls. The brush type matters. Nylon bristles work for most grout. Metal bristles damage grout and should be avoided entirely. For high-traffic tile areas, rotary scrubbers with controlled pressure deliver consistent agitation without the fatigue of hand scrubbing.
Water Management
This is the most overlooked variable in grout cleaning. Dirty mop water spreads contaminants back into grout pores, counteracting every other effort. Change rinse water frequently, at minimum every 100 square feet. In commercial settings or high-traffic properties, extraction equipment that removes dirty water immediately outperforms any mop-and-bucket approach.
- Use steam cleaning for medium to high porosity grout, keeping the steamer moving and limiting frequency to once a month.
- Apply chemical cleaners with a timer. Stop dwell at 15 minutes maximum to prevent efflorescence or sealer damage.
- Choose nylon brushes for agitation. Avoid metal bristles on any cementitious grout.
- Change rinse water every 100 square feet or more frequently in heavily soiled areas.
- Call a professional for deep cleaning when grout has not been cleaned in over a year or when microbial contamination is suspected.
How to maintain grout cleanliness and seal it properly after cleaning
Post-cleaning maintenance determines how long your results last. The first rule is patience before sealing. Sealing too early traps moisture and residues inside the pore structure, which causes discoloration and weakens the sealer bond. Wait 24–72 hours after deep cleaning before applying any sealer, adjusting for humidity and airflow in the space.
Follow this sequence for best results after a deep clean:
- Verify dryness. Check for dark spots, dampness, or poor airflow before sealing. Grout should be uniformly light in color and dry to the touch across the entire surface.
- Apply a penetrating sealer. Silicone or fluoropolymer sealers fill the pore structure and reduce soil absorption significantly. Topical sealers sit on the surface and wear faster in high-traffic areas.
- Wipe excess sealer immediately. Sealer left on tile faces can cloud the surface. Work in small sections and wipe within the manufacturer’s recommended window.
- Set a resealing schedule. In bathrooms and kitchens, reseal annually. In commercial or high-traffic properties, reseal every six months. The grout sealing guide from Carpetandtileplus covers timing and product selection in detail.
- Establish a routine cleaning schedule. Sweep or vacuum daily to remove abrasive particles. Mop weekly with a pH-neutral cleaner. Reserve deep cleaning for quarterly or biannual sessions depending on traffic.
The most common maintenance mistake is using dirty mop water for routine cleaning. Grout sits lower than the tile surface, which means it collects whatever the mop deposits. Frequent water changes during routine mopping prevent the gradual darkening that makes grout look permanently stained even when it is not.
Key takeaways
Grout porosity directly controls how deeply soils penetrate and which cleaning method can effectively remove them without causing damage.
| Point | Details |
|---|---|
| Test before you clean | Use the water-drop test to confirm sealing status before selecting any cleaning method. |
| Match method to porosity | High porosity grout requires penetration-based methods like steam or dwell cleaners, not surface wiping. |
| Control dwell time | Keep chemical cleaner dwell under 15 minutes to prevent efflorescence and sealer degradation. |
| Delay sealing after cleaning | Wait 24–72 hours after deep cleaning before sealing to avoid trapping moisture in pore structures. |
| Change rinse water often | Dirty mop water re-deposits soil into grout pores, undoing the cleaning effort. |
What 20 years of grout cleaning taught me about porosity
Most homeowners I talk to are surprised when I tell them their grout cleaning routine is making things worse. They mop regularly, they use good products, and the grout still looks gray and dingy six months after a professional clean. The problem is almost always the same: they are treating grout like tile.
Tile is a sealed, non-porous surface. Grout is not. When you mop a tiled floor with dirty water, the tile sheds it. The grout absorbs it. Every pass of a dirty mop is a deposit, not a withdrawal. I have seen bathroom grout in Elgin and Bartlett homes that looked clean from a distance but tested at extremely high microbial loads because the routine cleaning was spreading contamination rather than removing it.
The other mistake I see constantly is skipping the water-drop test. People assume their grout is sealed because it was sealed at installation five years ago. Sealers wear. In a bathroom with daily shower use, a sealer can be functionally gone within 18 months. Cleaning unsealed grout with the same method you would use on sealed grout is like washing a sponge with a damp cloth. You are not getting inside the problem.
Dwell time is the variable most people either ignore or abuse. More is not better. I have seen grout that was damaged by a homeowner who left a store-bought cleaner on for 45 minutes thinking it would do a deeper job. It did not clean deeper. It etched the surface and opened up the pore structure, making the grout stain faster going forward. Fifteen minutes is the ceiling for a reason.
My honest recommendation for any property with grout that has not been professionally deep cleaned in over two years: stop trying to maintain it with routine methods and start with a proper extraction clean. Then seal it correctly. Then maintain it. That sequence works. Reversing it does not.
— Jim
Professional grout cleaning built for porous surfaces

Porous grout requires equipment and technique that go beyond what store-bought products can deliver. Carpetandtileplus uses IICRC-certified technicians and professional-grade extraction equipment to remove embedded soils from deep inside grout pore structures, not just the surface layer. Organic cleaning products protect grout integrity while delivering a thorough clean. Whether you manage a commercial property in Arlington Heights or a family home in Streamwood, Carpetandtileplus tailors the cleaning approach to your grout’s actual porosity and sealing status. Explore residential tile and grout cleaning or commercial tile and grout cleaning services to get grout that is genuinely clean, not just visually cleaner.
FAQ
What is tile grout porosity?
Tile grout porosity is the percentage of void space within the grout structure that can absorb liquids and contaminants. Cementitious grout porosity typically ranges from 5–30% by volume depending on grout type and installation conditions.
How do i know if my grout is sealed?
Place a few drops of water on the grout line and wait 30 seconds. Beading indicates an intact sealer; rapid darkening means the grout is unsealed or the sealer has worn through and needs reapplication.
Can i use steam cleaning on porous grout?
Yes, steam cleaning works well on porous grout because the heat penetrates the pore structure to lift soil and kill microbes. Keep the steamer moving and limit use to once a month maximum to avoid expanding the pore structure.
How long should i leave cleaner on grout?
Dwell time should not exceed 15 minutes on any grout type. Excessive dwell can cause efflorescence on unsealed grout and degrade sealer bonds, leaving the surface more vulnerable after cleaning.
When should i reseal grout after deep cleaning?
Wait 24–72 hours after deep cleaning before applying sealer, depending on humidity and airflow. Sealing too early traps moisture in the pore structure and weakens the sealer bond over time.