
Ventilate the bathroom, wear gloves and eye protection, and never mix cleaners. None of this holds long term unless you fix the moisture behind it. If grout is crumbling, mold keeps coming back after repairs, or anyone in the house has breathing trouble, stop the DIY approach and call a professional.
TL;DR:
- Hydrogen peroxide at 3% is effective for surface mold and has milder fumes than bleach, making it safer for colored grout.
- Scrubbing with a stiff nylon grout brush and allowing adequate dwell time are crucial steps to prevent mold from reappearing after cleaning.
- Sealing grout every 12 to 24 months and maintaining proper ventilation and drying habits significantly reduce mold recurrence.
- Using high-pressure tools or abrasive pads damages grout and accelerates moisture retention, promoting mold growth over time.
- Persistent mold issues or crumbling grout should be addressed by professional remediation, especially if DIY steps fail or health symptoms worsen.
Table of Contents
- Shower Grout Mold Removal: The Step-By-Step Process
- Which Grout Cleaner Should You Use?
- Tools and Techniques That Protect Your Grout
- How to Stop Shower Mold From Coming Back
- When Should You Call a Professional Mold Remediation Service?
- What Kind of Mold Grows in Shower Grout?
- Mold, Mildew, or Just a Stain? How to Tell
- Natural Mold Removal Options Beyond Bleach and Peroxide
- Caring for Sanded vs. Unsanded Grout Long Term
- Publisher Perspective: What Actually Works After Two Decades of Grout Cleaning
- A Trusted Next Step for Stubborn Shower Grout Mold
- Sources
Shower Grout Mold Removal: The Step-By-Step Process
The order you do things in matters almost as much as which cleaner you grab. Skip a step and you either spread spores around the bathroom or scrub for twenty minutes with nothing to show for it.
Start with prep. Pull the shower curtain, bath mats, and any bottles or loofahs off the floor and walls. Turn on the bathroom exhaust fan or crack a window, since scrubbing mold kicks spores and fumes into the air you’re breathing. Put on rubber gloves and, if you’re sensitive to fumes or have asthma, a basic respirator mask and eye protection. Dab a small amount of whatever cleaner you’re using on a hidden patch of grout first and wait five minutes, just to confirm it won’t discolor the surface.
For most surface mold, hydrogen peroxide at the standard 3% drugstore concentration works well and doesn’t need diluting. Spray or dab it directly onto the moldy lines and let it sit 10 to 15 minutes. If you’re using bleach instead, follow the CDC’s guidance: no more than 1 cup of household laundry bleach per gallon of water. Never mix bleach with ammonia or any ammonia-based cleaner. That combination produces toxic gas, and it happens more often than you’d think when someone tries to “boost” a bleach solution with a second product.
Work the room in sections instead of attacking the whole shower at once:
- Apply your chosen cleaner to one wall or a 3 to 4 foot section of grout lines.
- Let it sit for the full dwell time. Rushing this step is the most common reason DIY treatments fail.
- Scrub with a stiff nylon grout brush, following the line of the grout rather than scrubbing in circles.
- Rinse thoroughly with hot water and wipe the section dry with a microfiber cloth.
- Move to the next section and repeat.
Once you’ve cleaned the whole shower, run the exhaust fan for another 30 minutes and leave the area to air out. If mold is still visible after rinsing, wait 24 hours before treating that same spot again. Repeated same-day scrubbing on wet grout rarely improves results and just extends your exposure to fumes.
Which Grout Cleaner Should You Use?
Not every mold-killing product belongs in every shower, and the wrong choice can leave you with clean grout that’s also permanently discolored.
- Chlorine bleach kills mold fast and is cheap, but the fumes are strong and it can lighten or streak colored grout over repeated use. Never combine it with ammonia.
- Hydrogen peroxide is nearly as effective with milder fumes, and it’s generally safer on colored grout than chlorine bleach.
- Oxygen bleach (sodium percarbonate) is less corrosive and a strong option specifically because it’s gentler on grout color while still cutting through stains.
- Vinegar and baking soda handle light mildew and odor well but shouldn’t be used on natural stone tile, since the acid can etch the surface.
- Commercial grout cleaners vary widely in strength; look for products carrying the EPA’s Safer Choice label if you want something effective with a lower health and environmental footprint.
Pro Tip: Consumer Reports testing found oxygen-bleach and specially formulated grout cleaners often outperform straight chlorine bleach on stubborn stains while doing less damage to colored grout, which makes oxygen bleach a smart default if you’re not sure what your grout can handle.
Tools and Techniques That Protect Your Grout
Grout is porous and softer than tile, so the tool you scrub with matters as much as the cleaner. A nylon grout brush, a small pump sprayer for even cleaner application, a microfiber cloth, and a squeegee cover almost every job. Skip steel brushes and abrasive pads. They dig grooves into grout that trap dirt and moisture even faster than before.
- Work in small patches so cleaner doesn’t dry out before you scrub it.
- Never use a pressure washer or high-pressure attachment on grout lines; it erodes the material and pushes water behind the tile.
- Rinse each section before it dries to avoid leaving cleaner residue behind.
Sometimes cleaning isn’t enough. If grout is crumbling, feels soft, or mold keeps showing up in the same spot after you’ve fixed ventilation, it’s time to remove and replace it. A grout saw handles small sections; caulk that’s peeling, moldy underneath, or permanently stained should be cut out and replaced rather than cleaned again. After removal, let the area dry completely before regrouting or re-caulking, or you’ll trap the same moisture problem behind new material.
How to Stop Shower Mold From Coming Back
Cleaning mold off grout is a temporary fix if the moisture problem underneath stays the same; the EPA is direct about this: mold growth is a symptom of excess moisture, not a standalone problem to scrub away.
A few daily habits make a real difference:
- Run the bathroom exhaust fan during every shower and for 20 to 30 minutes after.
- Squeegee the shower walls and glass immediately after use.
- Launder shower curtains and bath mats every one to two weeks.
- Wipe grout lines dry with a towel to help prevent moisture accumulation.
Beyond daily habits, seal your grout once it’s fully clean and dry. A quality sealant blocks moisture from soaking into the porous surface, and professionals typically recommend resealing every 12 to 24 months depending on how heavily the shower gets used. Check for slow leaks around the shower valve or drain, and replace any caulk that’s cracked or pulling away from the tile. The CDC/NIOSH guidance on remediation is blunt on this point: wet materials need to dry promptly, and painting over mold is never an acceptable substitute for actually removing it.
When Should You Call a Professional Mold Remediation Service?
DIY works fine for a small patch of surface mold in otherwise sound grout. It stops working once the mold covers a large area, keeps returning after you’ve fixed ventilation and leaks, or the grout itself is soft, cracked, or crumbling. Persistent respiratory symptoms in anyone using the bathroom are also a signal to stop scrubbing and get help, since mold exposure has been linked to respiratory symptoms and can worsen asthma.
Professional tile and grout cleaning services bring tools most households don’t have: containment barriers, moisture meters to confirm the source is actually dry, commercial-grade cleaning solutions, and fast drying equipment. That combination of proper dwell time, mechanical agitation, and industrial drying is genuinely hard to replicate with a spray bottle and a scrub brush. Before hiring anyone, ask whether their technicians are IICRC certified, whether they offer organic or low-fume cleaning products, how long drying takes, and whether the work comes with any guarantee.
What Kind of Mold Grows in Shower Grout?
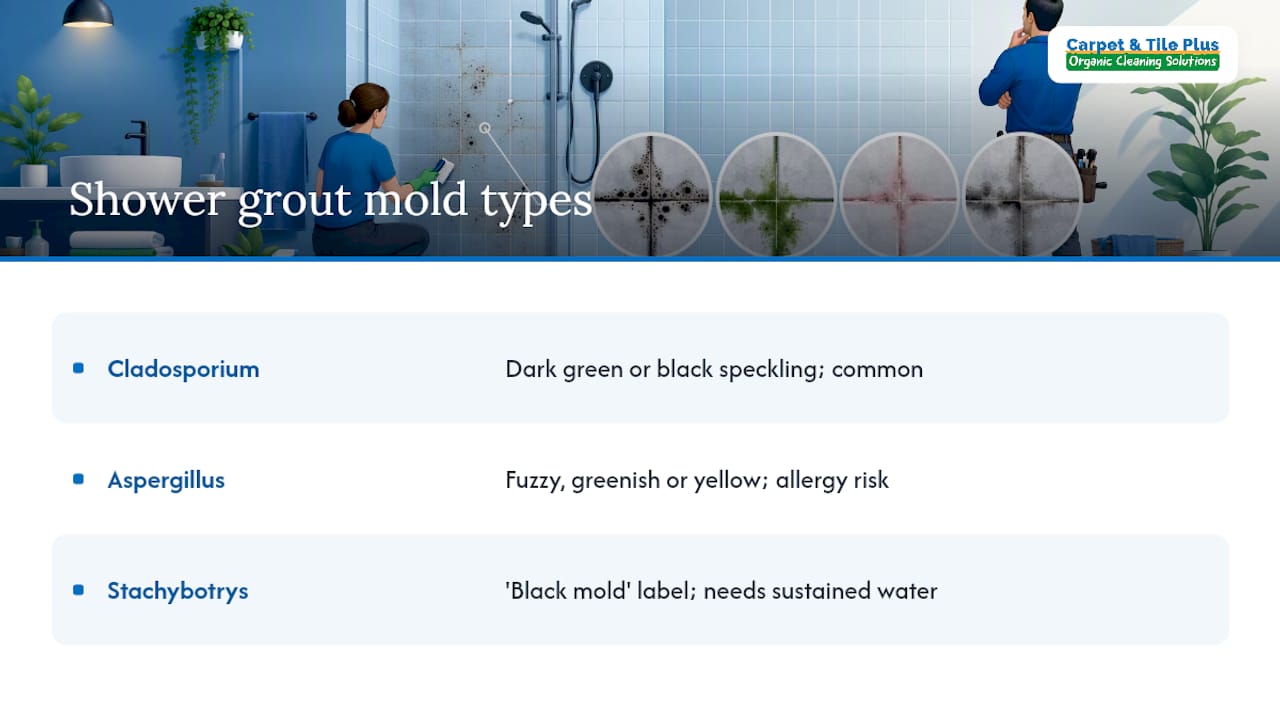
Bathroom grout mold is usually one of a handful of species that thrive on soap residue, skin cells, and constant moisture. Cladosporium shows up as dark green or black speckling and is one of the most common bathroom molds. Aspergillus tends toward a fuzzy, sometimes greenish or yellow growth pattern and can trigger allergic reactions in sensitive people. Stachybotrys, the mold often labeled “black mold” in headlines, needs sustained water exposure to establish itself, which makes it more likely in a shower with a slow leak than one that just gets steamy and dries out.
Health implications track with exposure and individual sensitivity more than with which species you’re looking at. People with asthma, allergies, or compromised immune systems tend to react faster and harder to any of these molds, and prolonged exposure in a small, poorly ventilated bathroom concentrates spores in the air you breathe during every shower. The CDC/NIOSH health effects data points to respiratory symptoms as the most common complaint, with asthma flare-ups showing up repeatedly in people with existing lung sensitivity.
You generally don’t need a lab test to know you have a mold problem worth addressing. Dark speckling in grout lines that doesn’t wipe away with plain water, a musty smell that lingers even after cleaning, or recurring symptoms tied to bathroom use are enough to justify treatment. If symptoms persist after you’ve cleaned and fixed ventilation, that’s a conversation for a doctor, not another round of bleach.
Mold, Mildew, or Just a Stain? How to Tell
Grout discoloration isn’t always mold, and treating a stain like it’s a biohazard wastes time and cleaner. Mold typically appears as dark green, black, or occasionally pink or orange spots with a slightly raised, fuzzy, or slimy texture once it’s established. Mildew is mold’s lighter cousin, usually appearing as a flat, powdery gray or white coating rather than deep-set discoloration.
A simple test separates the two from ordinary staining: dab a small amount of diluted bleach on the spot. If the discoloration fades quickly, you’re looking at mold or mildew, both of which respond to bleach’s whitening action. If the color barely changes, you’re probably dealing with a mineral stain, soap scum buildup, or a permanent dye stain from hair products or colored bath products, none of which mold treatments will fix. Persistent musty odor is another tell. Stains don’t smell; active mold and mildew usually do, especially in a closed, humid bathroom.
Texture matters too. Run a fingernail lightly over the spot. Mold often feels slightly raised or has a texture different from the surrounding grout, while a stain sits flush with the surface. If you’re still unsure after both checks, treat it as mold anyway. The cleaning process outlined earlier won’t hurt grout that just has a stubborn stain, but skipping mold treatment on an actual mold colony lets it keep spreading into the grout’s porous structure.
Natural Mold Removal Options Beyond Bleach and Peroxide
If you’d rather avoid harsher chemicals, a few natural options handle light to moderate mold and mildew reasonably well, though they’re generally slower and less effective against established or deep-set growth than hydrogen peroxide or bleach.
Straight white vinegar, applied full strength and left to sit for an hour, breaks down light mildew and neutralizes odor thanks to its acidity. It won’t hold up against heavier mold and shouldn’t be used on natural stone tile like marble or travertine, since the acid etches the stone’s surface over time.
Baking soda works well as a mechanical scrubbing aid rather than a chemical killer. Mixed into a paste with a small amount of water, it adds gentle abrasion that helps lift mold residue without scratching grout. Combining it with vinegar in a two-step process, vinegar first to loosen buildup, baking soda paste second for scrubbing, covers a decent range of light mold situations without any bleach fumes in the bathroom.
Tea tree oil, diluted in water at roughly one teaspoon per cup, has some natural antifungal properties and leaves a pleasant scent, though the evidence behind it is far thinner than the CDC-backed data behind bleach and peroxide. Treat it as a maintenance option for keeping mild mildew at bay between deeper cleanings, not a replacement for a proper treatment on established mold.
Caring for Sanded vs. Unsanded Grout Long Term
Sanded and unsanded grout age differently, and treating them the same way over the years is how a lot of homeowners end up regrouting sooner than they need to.
Sanded grout, used mainly in joints wider than 1/8 inch, is more porous by nature because of the sand additive that gives it strength. That porosity means it soaks up moisture and soap residue faster, so it benefits from sealing sooner after installation and more frequent resealing, generally toward the shorter end of the 12 to 24 month range professionals recommend. Skipping sealing on sanded grout in a shower is close to guaranteeing mold takes hold within the first year or two.
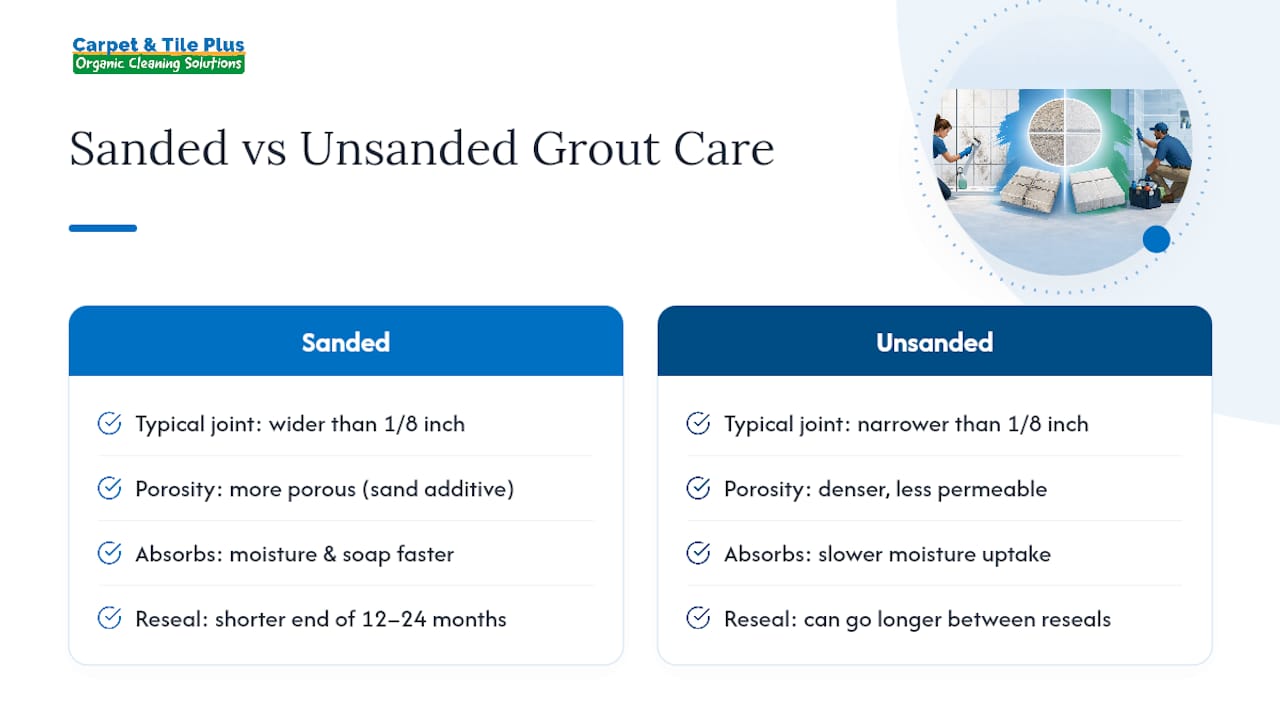
Unsanded grout, used in narrower joints, is naturally denser and slightly more resistant to moisture penetration, though it’s still far from waterproof. It can typically go longer between resealing, but it’s also less forgiving of abrasive cleaning tools, since it’s softer and more prone to scratching or pitting than sanded grout.
For both types, the maintenance routine that actually extends their life is the same: keep water off standing grout lines, run the exhaust fan, and don’t let cleaning slide until mold has already taken hold. A proper cleaning before resealing matters more than the sealant itself, since sealing over trapped moisture or residue just locks the problem under a fresh coat and defeats the purpose entirely.
Publisher Perspective: What Actually Works After Two Decades of Grout Cleaning
Most homeowners over-bleach and under-fix. Dumping stronger bleach on grout without addressing the leak or the fan that never runs just buys a few weeks before the mold reappears. What consistently works is boring: correct dwell time, real scrubbing with the right brush, and sealing once everything is dry. IICRC-certified technicians and organic cleaning options exist precisely because “stronger chemical” isn’t the same as “better result.”
— Jim
A Trusted Next Step for Stubborn Shower Grout Mold
If you’ve followed the steps above and mold keeps coming back, or the grout looks too far gone to keep treating yourself, that’s exactly the gap Carpetandtileplus fills. Our IICRC-certified technicians use organic cleaning products strong enough to lift embedded mold without the harsh fumes of a straight bleach treatment, and most jobs dry within about an hour, so your bathroom isn’t out of commission for a day.

A typical appointment includes a full assessment of your grout condition, deep cleaning of every affected line, and an optional sealing step to help prevent mold from returning once the surface is completely dry. We serve homeowners throughout the Northwest Suburbs of Chicago, including Elgin, Bartlett, Streamwood, Arlington Heights, Palatine, Barrington, and Hanover Park. If your shower grout has crossed the line from a weekend project into a recurring headache, get a quote through our residential tile and grout cleaning page and let a certified technician handle it properly the first time.
Sources
Claims on safety and cleaning method come from the CDC, EPA, SERVPRO, and Consumer Reports testing.
- Mold and Your Health — CDC
- Mold basics — EPA
- Best grout cleaners, according to tests — Consumer Reports