
The fastest safe fix is plain water: dampen a microfiber cloth or cheesecloth and buff the cloudy film off before it fully cures, then step up to a pH-neutral or grout-specific cleaner if that doesn’t clear it, and only reach for a manufacturer-approved acidic remover on acid-resistant tile like ceramic or porcelain. Skip the acid entirely on natural stone. Test everything on a small hidden patch first.
Here’s the escalation order that keeps most homeowners from calling a repair crew:
- Test any product on a hidden tile or offcut before touching the whole floor
- Pre-wet the grout joints so a cleaner or acid treats only the haze, not the grout itself
- Agitate with a white nylon pad instead of a wire brush or anything abrasive
- Rinse thoroughly and neutralize if you used anything acid-based
- Call a certified pro for cured epoxy haze or any sign of stone etching
Pro Tip: Grout haze is easiest to remove in the first 24 hours. If you’re reading this a week after your tile was installed, expect to need a stronger product than you would have needed on day one.
Manufacturers like LATICRETE and MAPEI publish exact dilution ratios and dwell times for their haze removers, and following those numbers matters more than most DIY guides let on. When a job goes beyond what a bucket and a nylon pad can handle, an IICRC-certified technician has the tools and training to finish it without damaging the surface underneath.
Key Takeaways
Grout haze removal works best as a graduated process: start with water, escalate to neutral cleaners, then to manufacturer-approved acid only on acid-tolerant tile, and never on natural stone.
| Point | Details |
|---|---|
| Start mild, escalate slowly | Water and microfiber first, then neutral cleaner, then diluted acid only if needed. |
| Timing changes everything | Haze removed within 24 hours takes far less effort than haze left to cure for two weeks. |
| Stone needs different rules | Marble, travertine, and limestone require alkaline or neutral products; acid causes permanent etching. |
| Epoxy haze needs specific products | Cured epoxy residue calls for epoxy-grade removers like UltraCare or STONETECH, not standard cleaners. |
| Call a pro for stubborn or risky cases | Carpetandtileplus’s IICRC-certified technicians handle cured epoxy haze and stone restoration safely. |
Table of Contents
- What Tools and Safety Gear Do You Need Before Starting Grout Haze Removal?
- How Do You Remove Grout Haze Step by Step?
- Which Tile and Grout Types Tolerate Acid Cleaners?
- How Long Should You Wait Before Using Stronger Cleaners?
- When Should You Call a Professional for Grout Haze Removal?
- How Can You Prevent Grout Haze Before It Starts?
- What I’ve Learned Watching This Process Play Out
- When a Certified Tile and Grout Cleaning Service Makes More Sense
- Frequently Asked Questions
- Sources
What Tools and Safety Gear Do You Need Before Starting Grout Haze Removal?
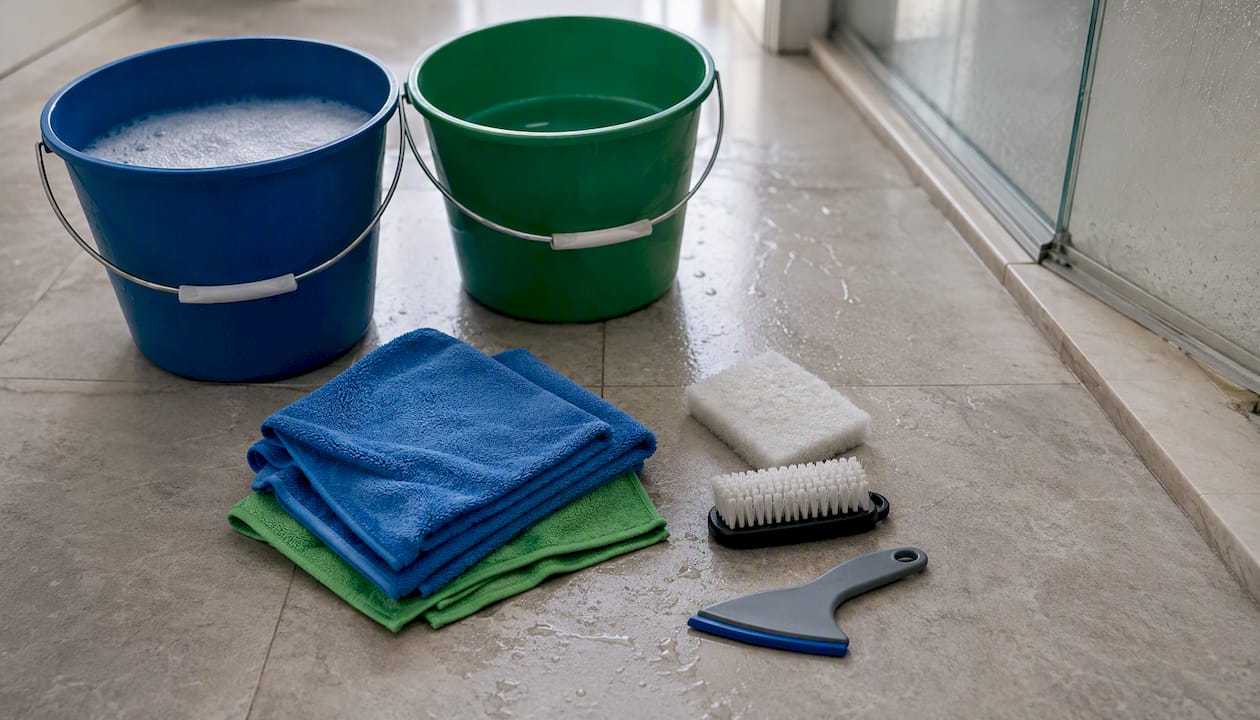
Get everything within reach before you open a single bottle. Set up two buckets, one for clean solution and one for rinse water, along with microfiber cloths, cheesecloth, a few white nylon pads, a soft-bristled brush, a plastic scraper, and a sponge. A wet vac speeds up rinsing on larger floors but isn’t required for a bathroom or small kitchen backsplash.
Cleaners fall into four rough categories: plain water, pH-neutral or grout-specific cleaners, diluted acid-based haze removers for cured cementitious residue, and epoxy-specific removers for cured epoxy grout haze. Trade dilutions for acidic removers typically run 1:4 to 1:20 depending on how stubborn the haze is, and going stronger than instructed rarely speeds things up. It just raises your odds of damage.
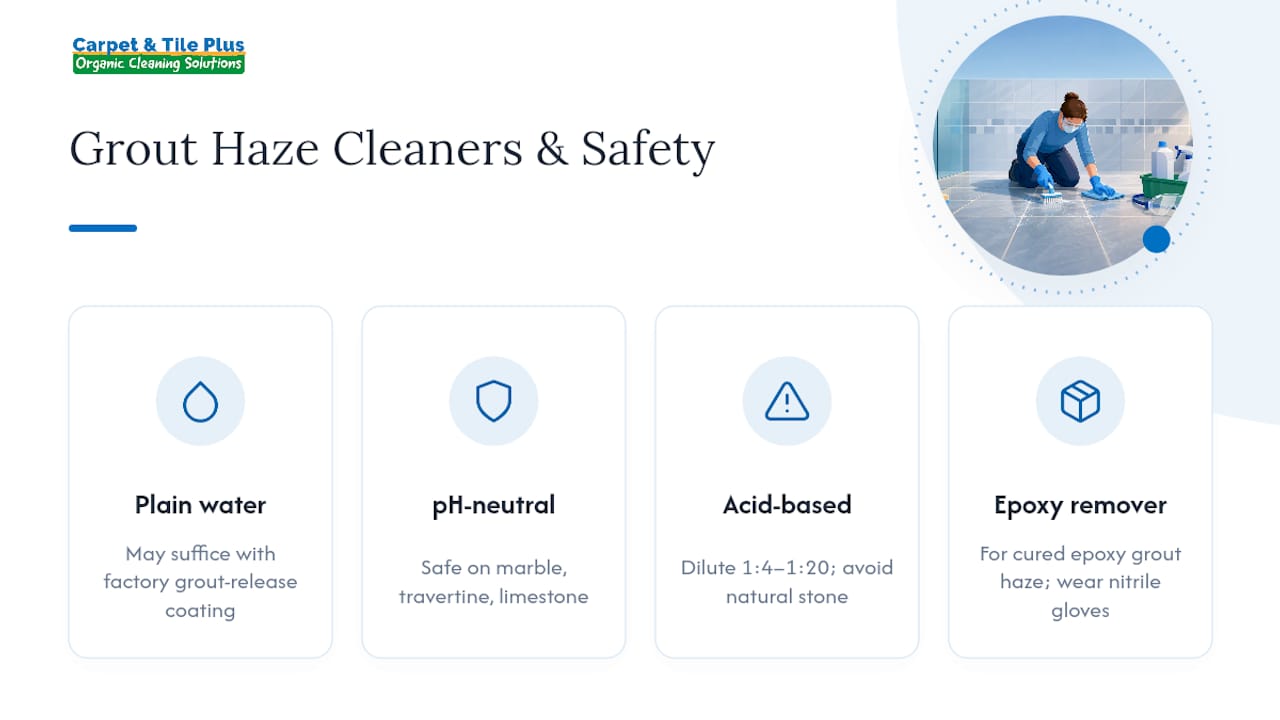
Wear nitrile gloves and eye protection, work with a window open or a fan running, and never mix acid products with bleach. If your tile happens to have a factory grout-release coating, a plain wash might be all you need, so check before you reach for anything stronger.
Pro Tip: Acid and marble, travertine, or limestone don’t mix. Even a diluted acidic cleaner will dull and etch these stones permanently, so stone floors call for alkaline or neutral products only.
How Do You Remove Grout Haze Step by Step?
Grout haze removal works best as a ladder, not a single attack. Climb one rung at a time and stop as soon as the tile looks clean.
- Fresh haze (0 to 24 hours): Dampen a microfiber cloth or cheesecloth and buff in small circles, changing your rinse water often. Most fresh haze lifts with nothing more than water and elbow grease.
- Set haze (24 to 72 hours): Move to a pH-neutral or grout-specific cleaner and agitate with a white nylon pad. Clean, then do a separate dry-buff pass. Professional cleaners follow this same two-pass logic: clean first, dry second, so nothing dries cloudy again.
- Cured cementitious haze: Once the film has carbonated, usually after three days or more, a diluted acid-based remover following LATICRETE or MAPEI dilution guidance is usually what it takes. Pre-wet the joints first. Pre-wetting keeps the acid working on the haze film instead of soaking into the grout itself. Give it a short dwell, agitate with the white pad, and rinse well. Never use this step on natural stone.
- Epoxy and urethane haze: Cured epoxy residue needs an epoxy-grade remover such as UltraCare Epoxy Grout Haze Remover CG or STONETECH stripper for fully cured film. For haze caught early, some installers use plain dishwasher detergent (Cascade works) mixed with a bit of sand as light abrasive, a method LATICRETE’s own technical sheet describes for the early window before epoxy fully sets.
- Rinse and neutralize: Rinse two or three times, swapping in clean water each round, then buff dry. If you used an acid product, neutralize it exactly as the label instructs. Never let any of these products dry on the tile surface.
Pro Tip: Work in sections of one to four square feet, inspect the tile under raking light once it’s dry, and limit yourself to two or three passes with any harsh chemistry. If it’s not working by pass three, the problem is bigger than a cleaning product can solve.
Which Tile and Grout Types Tolerate Acid Cleaners?
Most glazed ceramic, standard porcelain, quarry tile, and glass tile can handle a diluted acidic haze remover, though polished porcelain still deserves a gentle touch since abrasive pads can dull the finish. Always run a test patch regardless of what the box says.
Marble, travertine, limestone, and onyx are a different story. Acid etches these stones on contact, and once it happens, buffing won’t fix it. You’re looking at professional polishing or, in bad cases, replacement. Stick to stone-safe alkaline or pH-neutral products on anything in this category.
Grout chemistry matters too. Standard cementitious grout responds well to diluted acid once haze has cured. Ready-mixed acrylic or urethane grout leaves residues that need solvent-based or organic-targeted cleaners instead. Epoxy grout is its own animal entirely, often requiring the epoxy-specific removers covered above or a professional’s touch, per LATICRETE’s TDS 198.
- Pick a 6 to 12 inch test area, not a corner too small to judge
- Apply your chosen product, wait 5 to 15 minutes, then rinse and let dry
- Inspect for etching, dulling, or color shift before treating the full floor
- When in doubt, check the tile or grout manufacturer’s technical data sheet first
How Long Should You Wait Before Using Stronger Cleaners?
Timing decides which method you’ll need, and waiting too long is the single most common mistake homeowners make.
- 0 to 24 hours: Fresh haze usually wipes off with a damp microfiber cloth alone.
- 24 to 72 hours: The film has started to set. Neutral or grout-specific cleaners with a bit more agitation typically handle it.
- 3 days to 2 weeks: Haze has cured and often needs diluted acid or, on stone, professional mechanical polishing.
- Beyond 2 weeks: Cured haze is stubborn, and waiting this long usually means a stronger product or a professional visit, especially on stone.
Grout cure times vary by product, so check the manufacturer’s technical data sheet before applying anything aggressive. Some epoxies set faster than standard cementitious grout, which shrinks your easy-removal window considerably.
When Should You Call a Professional for Grout Haze Removal?
Some jobs cross a line where DIY risk outweighs DIY savings. Call a pro when haze survives two or three careful passes with safe products, when you’re dealing with cured epoxy haze that’s gone beyond what a consumer product can touch, or when you spot etching on stone that’s already bonded with residue.
Professionals bring a different toolkit. They test the substrate first, use trade-grade removers at correct dilutions and dwell times, and can bring in controlled diamond polishing for stone that’s been etched. They’ll also do multiple rinse passes with a wet vac and reseal the surface afterward if the tile calls for it.
- Look for IICRC-certified technicians with documented training
- Confirm they follow manufacturer TDS-based methods, not guesswork
- Ask what happens if the haze doesn’t lift, so you know the fallback plan
- Weigh the cost of professional remediation against the cost of permanently etched stone
Pro Tip: A $200 professional visit is cheap insurance next to a marble floor that needs full re-polishing because a DIY acid treatment went wrong.
How Can You Prevent Grout Haze Before It Starts?
Prevention beats removal every time, and most of it happens on installation day. Use the grout float to pull off excess before it dries, then follow with a barely damp sponge for cleanup, swapping rinse water frequently so you’re not smearing grout fines back onto the tile.
- Work in small sections instead of grouting an entire room at once
- Avoid over-wetting joints, which pulls grout fines to the surface and creates more haze
- Follow the grout manufacturer’s final-wash timing exactly as listed on the TDS
- Seal stone surfaces with a stone-specific sealer once cleaning is done to cut down on future residue
What I’ve Learned Watching This Process Play Out
The stepwise approach isn’t just the safest option. It’s usually the one that actually works, because most homeowners who reach for the strongest product first end up doing more damage than the haze itself would have caused. Patience beats horsepower here.
If you take away one thing, let it be this: water first, neutral cleaner second, acid only on acid-tolerant tile, and a phone call to a certified pro the moment you see etching or cured epoxy that won’t budge. That order has saved more tile floors than any single product on the shelf.
When a Certified Tile and Grout Cleaning Service Makes More Sense
DIY covers a lot of ground, but cured epoxy haze, etched stone, and large-scale jobs call for equipment most garages don’t have: trade-grade removers, controlled dwell times, and diamond polishing pads that correct damage instead of causing it.

Carpetandtileplus brings IICRC-certified technicians and organic cleaning products to every job, along with a one-hour dry time that keeps your household or business moving instead of waiting around for tile to dry. Our team has spent over 20 years working through exactly the scenarios covered here, from freshly grouted kitchens to cured haze on stone that needed careful correction rather than another round of scrubbing. If your tile’s grout haze has survived a few honest DIY attempts, or you’re dealing with natural stone where one wrong product means permanent damage, it’s worth getting a professional opinion before it gets worse. Reach out for an estimate on residential tile and grout cleaning and have your tile type, grout type, approximate square footage, and a few photos ready. That’s usually all we need to give you a straight answer and a plan.
Frequently Asked Questions
What is the best way to remove grout haze without damaging tile?
Start with water and a damp microfiber cloth, move to a pH-neutral cleaner if needed, and only use a diluted acid-based remover on acid-resistant tile after testing it on a hidden patch.
Can I use vinegar for grout haze removal?
A mix of 3 to 4 parts water to 1 part distilled white vinegar can lift light haze on acid-tolerant tile, but it’s weaker than purpose-made removers and still risky on stone.
How do I remove epoxy grout haze specifically?
Use an epoxy-grade remover such as UltraCare Epoxy Grout Haze Remover CG or a STONETECH stripper for cured residue, or try a dishwasher-detergent-and-sand method if you catch it within the early window described in LATICRETE’s technical sheet.
Is it safe to use acid-based grout haze removers on natural stone?
No. Acid etches and permanently dulls marble, travertine, limestone, and onyx. Use stone-safe alkaline or neutral products instead.
When should I call a professional for grout haze removal?
Call a pro when haze survives two or three safe DIY passes, when you’re dealing with fully cured epoxy residue, or when you notice any etching on stone.
Sources
Before reaching for anything stronger than water, check the manufacturer’s own guidance: LATICRETE’s heavy-duty haze remover sheet and MAPEI’s haze removal how-to cover dilution ratios and dwell times in detail. This Old Grout and The Spruce offer solid homeowner-level walkthroughs, and the LATICRETE TDS 198 covers epoxy-specific cure times and safety notes worth reading first.
- LATICRETE Heavy Duty Grout Haze Remover (product doc)
- MAPEI — How to remove grout haze (industry how-to)
- The Spruce — How to remove grout haze