
Fresh urine caught within an hour or two usually comes out without replacing the padding underneath. Once it sits for days, dries, and reaches the pad or subfloor, uric acid crystals form and surface cleaning alone usually does not stop the odor. The fix is enzyme treatment plus extraction, checked with a UV blacklight and a moisture meter. Blot it now, then map it before you decide what’s next.
TL;DR:
- Urine can spread three to four times wider under the carpet than the visible stain, reaching the padding or subfloor in minutes.
- UV blacklight, moisture meters, and smell tests are essential for assessing how deep contamination has gone before treatment.
- Immediate blotting, enzyme cleaning, and fast moisture extraction within the first few hours prevent urine from soaking into the pad.
- Deep-set urine saturation requires a sequence of treatments, including sub-surface injection and sealing the subfloor, to fully eradicate odors.
- Pad replacement is necessary when odor persists after multiple treatments or the pad shows damage, with subfloor sealing preventing reinfection.
Table of Contents
- How Do You Check If Urine Reached the Carpet Padding?
- What’s the Right DIY Method for a Fresh Accident?
- What If Urine Already Soaked Into the Pad or Backing?
- When Does Carpet Padding Need to Be Replaced?
- How Do You Prevent Pet Urine From Reaching the Pad Again?
- When Should You Call a Professional Instead of Handling It Yourself?
- A Cleaning Pro’s Take on the Mistakes That Make This Worse
- Sources
How Do You Check If Urine Reached the Carpet Padding?
You can’t tell how deep urine went by looking at the surface. Urine moves through the carpet face into the backing and pad within minutes, driven by gravity and capillary action, and the contamination zone under the pad often runs three to four times wider than the visible stain. That means a spot the size of a dinner plate on top can hide a patch the size of a serving tray underneath.
Three checks tell you what you’re dealing with:
- UV blacklight walk-through. Dim the room and sweep a blacklight low across the carpet. Old urine fluoresces yellow-green under UV light, and the IICRC lists this as standard diagnostic practice for figuring out how far contamination spread before you commit to a treatment method.
- Moisture meter or probe. Press a pin-style moisture meter into the carpet near the stain. Elevated readings below the surface mean the pad has absorbed liquid, not just the fibers.
- Smell test at floor level. Kneel down and press your palm into the carpet for a few seconds, then smell your hand. A sharp ammonia smell that returns after cleaning almost always points to pad involvement.
Photograph every UV hit with a ruler or coin in frame for scale, and jot down moisture readings by location. If you end up calling in help, that record lets a technician, like the ones our team sends out under professional carpet damage assessment, skip straight to treatment instead of re-diagnosing from scratch.
Pro Tip: Do the UV scan at night or with blackout curtains closed. Daylight washes out the fluorescence and you’ll miss smaller satellite spots around the main stain.
What’s the Right DIY Method for a Fresh Accident?
Speed is everything here. The faster you blot and treat, the less urine reaches the pad in the first place, and one review of pad contamination cases found that homeowners who scrub and over-wet a spot instead of blotting it tend to drive urine deeper into the padding rather than lift it out.
For an accident caught within the first hour or two:
- Blot, don’t rub. Press white towels or paper towels straight down over the spot and stand on them if needed. Rubbing spreads the liquid sideways into clean fiber.
- Rinse with cool water. A light rinse dilutes remaining urine before it concentrates as it dries. Don’t soak the area.
- Apply an enzyme cleaner. Pick a product labeled specifically for pet urine, not a general stain remover. Saturate the area (not the whole room) so the enzyme reaches as deep as the urine did.
- Let it dwell. Follow the label’s dwell time, usually 15 to 30 minutes minimum, and longer for older spots. Enzymes need contact time to break down the proteins.
- Extract the moisture. Use a wet/dry vacuum or a carpet extractor to pull out the liquid rather than letting it air dry into the pad.
- Speed-dry the area. Point a fan or air mover at the spot for several hours. Fast drying limits how long any residual moisture sits in the pad, where mold and lingering odor take hold.
Before applying enzyme cleaner to a visible area, test it on a hidden corner of carpet to check for colorfastness. Skip bleach, ammonia, or heavy-duty oxidizers on fresh spots. Those chemicals can set the stain, damage dye, and do nothing to break down the uric acid that causes recurring odor.
Statistic Callout: Most contamination that’s caught early and treated correctly resolves in one to three treatment cycles, according to professional case data on pad contamination.
What If Urine Already Soaked Into the Pad or Backing?
Water alone won’t fix this stage. Uric acid crystals are hydrophobic, meaning they resist water and can sit inert in the pad for months, then reactivate with humidity and produce that unmistakable ammonia smell on a humid afternoon. Rental hot water extraction machines and topical sprays typically only reach the carpet face, and running one over a saturated spot without proper sub-surface access can actually push contamination further into the pad.
Getting a deep-set spot back to neutral requires a specific order of operations, and the industry-standard sequence for pro-level jobs looks like this:
- UV mapping first, to trace the full contamination boundary rather than just the visible stain.
- Enzyme saturation, applied through the carpet directly into the backing so it reaches the pad, not just the fiber tips.
- Sub-surface injection or flushing, using specialized tools to push cleaning solution into the pad and pull it back out under suction.
- Hot water extraction, to lift the loosened contaminants and rinse water.
- An oxidizer or neutralizer pass, when enzyme treatment alone hasn’t fully knocked down the odor.
- A neutral pH rinse, to stop any cleaning residue from attracting new dirt (a common cause of that “clean but it smells worse” complaint covered in more detail on our carpet odor after cleaning page).
- Aggressive air movement, because any moisture left behind restarts the whole odor cycle.
Pro Tip: Skipping the sub-surface step and going straight from enzyme spray to surface extraction is the single most common reason pet odor “comes back” a few weeks after a cleaning.
Sub-surface treatment is often effective through two cycles; persistent odor beyond that may indicate pad saturation or subfloor contamination requiring further intervention.
When Does Carpet Padding Need to Be Replaced?
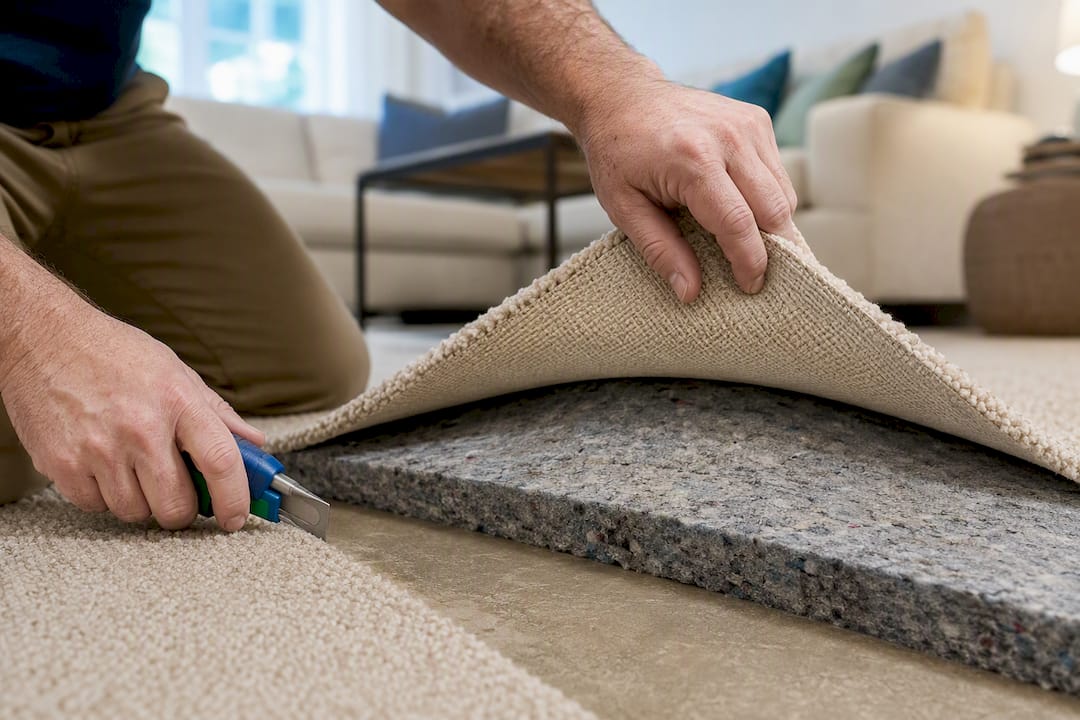
Three signs mean the pad has gone past the point of chemical treatment: odor that returns after two thorough professional cycles, padding that crumbles or feels mushy when pressed, and visible staining on the subfloor itself once the carpet is pulled back. Any one of these on its own is a reasonable trigger to stop treating and start replacing.
The replacement process, done right, follows a set order:
- Pull the carpet back from the affected area (or the whole room, depending on spread).
- Remove and discard the contaminated pad. Pad is cheap compared to labor, so most technicians replace more than the minimum footprint to avoid a second trip.
- Clean and inspect the subfloor. Wood subfloors that absorbed urine often need an oil-based or shellac primer, similar in function to a KILZ-type sealer, because uric acid can lodge in wood grain deep enough that cleaning alone can’t fully remove it.
- Seal the subfloor before new pad goes down. This step is what actually stops odor from re-emerging through fresh materials months later.
- Install new pad and re-stretch the carpet back into place.
A single-room pad and subfloor job typically runs from a few hundred dollars for a small, contained area up to several times that for a full room with subfloor sealing. Compare that to two rounds of sub-surface professional treatment, and replacement often becomes the more economical call once contamination is confirmed deep.
How Do You Prevent Pet Urine From Reaching the Pad Again?
Prevention comes down to reaction speed and the right supplies on hand, since most pad damage starts with a spot that sat too long before anyone noticed. Keep white towels, an enzyme spray made for pet urine, and a small wet/dry vacuum somewhere accessible, not buried in a closet.
- Blot and treat within the first hour whenever possible. Minutes matter more than product choice.
- Ask about denser, moisture-resistant padding or a carpet protector treatment when replacing pad. Some flooring choices hold up to pet accidents better than others, and a protector applied after cleaning slows how fast liquid wicks downward.
- Restrict pet access to high-risk rooms until house-training is solid, especially with a new puppy or a recently adopted dog.
- Get an older pet with sudden, repeated accidents checked by a vet. Incontinence tied to age or a urinary tract issue looks identical to a training lapse from the carpet’s perspective, but the fix is completely different.
When Should You Call a Professional Instead of Handling It Yourself?
Call a pro once the UV scan shows a contamination area noticeably larger than the visible stain, moisture readings stay elevated below the surface, or odor comes back after two honest DIY attempts. Visible pad breakdown or subfloor staining once you pull back a corner of carpet is also a clear stop sign.
A professional visit typically includes:
- Full UV and moisture diagnostics before any chemical touches the carpet.
- A tiered recommendation: surface enzyme treatment, sub-surface injection and extraction, or pad removal with subfloor sealing, based on what the diagnostics actually show.
- Realistic time estimates and, in many cases, a guarantee on the treated area that DIY products simply can’t offer.
Pro Tip: Ask any technician you hire whether they document contamination with before-and-after UV photos. That record is the clearest proof a job actually reached the pad, not just the carpet face.
Some professional cleaning companies run UV mapping and moisture diagnostics on pet odor calls, with IICRC-certified technicians handling treatments from enzyme surface cleaning to sub-surface extraction. If a spot has been fighting you for weeks, our carpet pet stain and odor removal service is built to diagnose the actual depth of the problem before quoting a fix, rather than guessing.
A Cleaning Pro’s Take on the Mistakes That Make This Worse
The biggest mistake homeowners make isn’t skipping cleaning. It’s scrubbing hard and dumping water on a spot, which spreads contamination sideways before anyone gets a chance to treat it properly. A simple sequence works better: blot, map with UV or your nose, treat with enzyme, dry it fast, then monitor for a week. If you do end up calling someone in, take your own UV photos first. It’s the fastest way to prove whether a treatment actually worked.
— Jim
Sources
For deeper technical detail, see the IICRC carpet topics tip sheet and our own pet-friendly UV mapping guide.
- IICRC carpet topics tip sheet
- Pet Urine Contamination Zone in Carpet: How Far It Spreads and How to Treat It
- Carpet Cleaning for Pet Stains and Odors: Techniques and Expectations
- Pet Urine Removal: The Pro Carpet Cleaning Guide
- Can Pet Urine Soak Into Carpet Padding?